
- SureCookie Installation Guide
- Installing SureCookie Pro
- Updating SureCookie
- How to Set Up SureCookie: Onboarding Wizard Guide
- SureCookie Dashboard Overview
- Connecting Your Site to SureCookie (Scanner Setup)
- Using SureCookie on Multiple Sites
- Uninstalling SureCookie & Data Cleanup
- SureCookie Shortcodes Reference
- Preferences Settings (Menu, Branding, Analytics)
- Customizing Banner Content
- Customizing Banner Layout
- Custom CSS for Banner Styling
- How to Configure the Floating Widget
- Customizing the Preference Modal
- Controlling Where the Cookie Banner Appears
- Customizing Banner Colors (Custom Colors, WCAG)
- Customizing the Blocked Content UI
- Banner Text in the Wrong Language (WPML, Polylang, and Locales)
- Re-Consent
- Understanding SureCookie Logs
- How to Set Up Geographic Targeting
- Block Scripts Until Consent (Resource Blocking)
- Setting Up Google Consent Mode v2
- Consent Models Explained (Opt-in vs Opt-out)
- Exporting Consent Logs (PDF Proof + CSV)
- Consent & Data Settings (Duration, Retention, Renew)
- Consent Forwarding Across a Multisite Network
- Resource / Script Blocking (Add Embeds + Fixes)
- Troubleshooting SureCookie
- Fix a Stuck or Failed Cookie Scan
- Why Some Cookies Aren’t Detected
- Banner Not Appearing: Troubleshooting
- Settings or Cookie Categories Not Saving or Loading
- Embeds Blocked After Consent (YouTube, Maps, Vimeo)
- Site Performance / Page Speed
- Scanning Your Site From Your Browser
- Importing and Exporting SureCookie Settings
- Verifying Your Domain With a DNS Record
Custom CSS for Banner Styling
For advanced users who need complete control over the banner’s appearance, use the Custom CSS section to write your own CSS rules. Changes will be reflected in both the preview and frontend after saving.
How to Add Custom CSS
1. Scroll to the Custom CSS section at the bottom of the Banner settings.
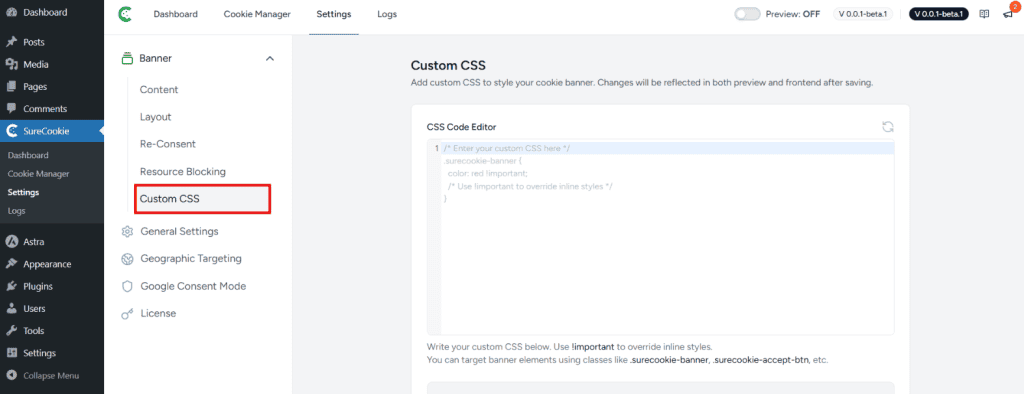
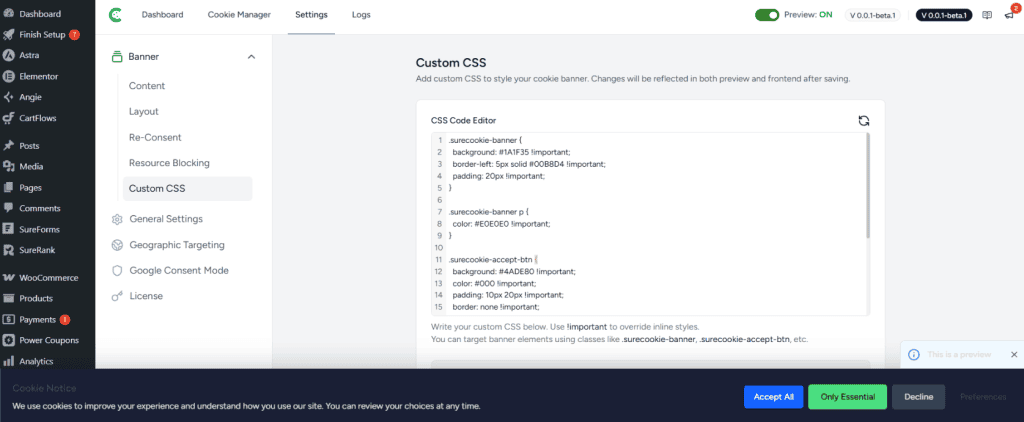
2. Click in the CSS Code Editor and write your CSS rules.
3. Click the green Save Changes button to apply your changes.
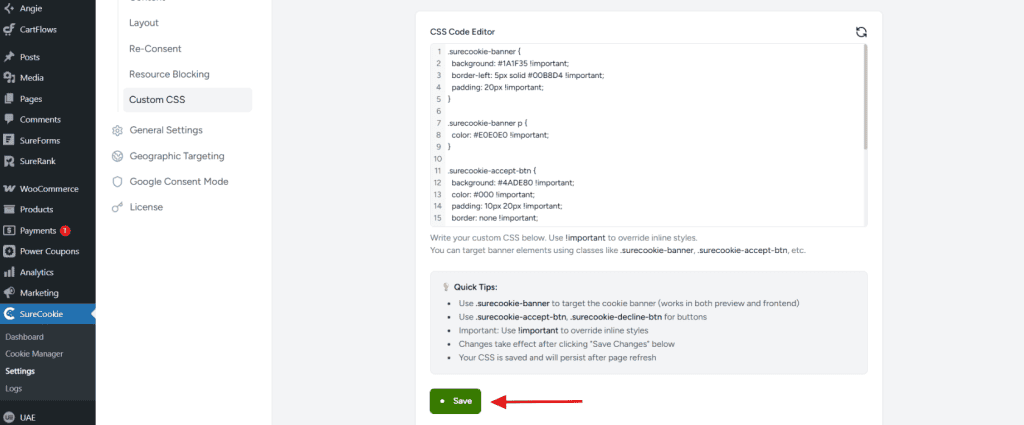
4. Your CSS is saved and will persist after page refresh.
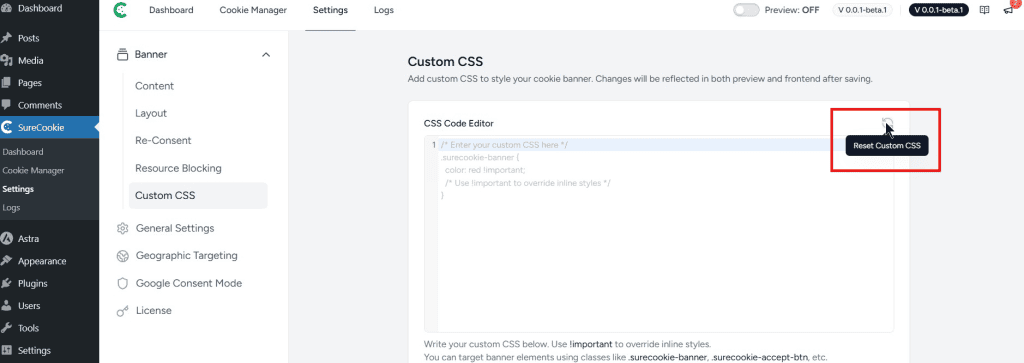
Reset Custom CSS Button
Click this button to clear any custom CSS code you’ve added to the plugin and return to the default styling. This is helpful if your custom CSS is causing design issues, conflicts, or unwanted changes to your site’s appearance. Your other plugin settings will stay the same. Make sure to save any CSS you want to keep before clicking, as this action cannot be undone right away.
Using Custom CSS Effectively
Write your custom CSS below. Use the !important flag to override inline styles if needed.
You can target banner elements using classes like:
- .surecookie-public-banner: This is the parent class of Surecookie Banner. Apply this class to your banner element so all styling cascades to child elements and maintains consistent spacing and appearance.
- .surecookie-banner: Target the cookie banner (works in both preview and frontend)
- .surecookie-accept-btn, .surecookie-decline-btn: Target specific buttons and other element classes as needed
Quick Tips
• Target the banner: Use .surecookie-banner to style the entire banner container (works in both preview and frontend)
• Target buttons: Use .surecookie-accept-btn and .surecookie-decline-btn for individual button styling
• Override styles: Use !important to override inline styles when needed
• Save changes: Click “Save Changes” to apply your CSS
• Persistent CSS: Your CSS is saved and will persist after page refresh
Common CSS Classes
SureCookie uses the following CSS classes that you can target with your custom CSS:
.surecookie-banner
The main banner container. Target this to style the entire banner appearance, including background color, padding, borders, and shadows.
.surecookie-accept-btn
The “Accept All” button. Use this to customize the button’s color, font size, padding, or hover effects.
.surecookie-decline-btn
The “Decline” button. Use this to style the decline button independently from other buttons.
Example
.surecookie-banner {
  background: #1A1F35 !important;
  border-left: 5px solid #00B8D4 !important;
  padding: 20px !important;
}

.surecookie-banner p {
  color: #E0E0E0 !important;
}

.surecookie-accept-btn {
  background: #4ADE80 !important;
  color: #000 !important;
  padding: 10px 20px !important;
  border: none !important;
  border-radius: 5px !important;
}

.surecookie-decline-btn {
  background: #334155 !important;
  color: #E0E0E0 !important;
  padding: 10px 20px !important;
  border: none !important;
  border-radius: 5px !important;
}
Tips and Best Practices
• Always use !important when overriding inline styles. This ensures your custom CSS takes precedence.
• Test your CSS in Preview Mode before applying to your live site.
• Keep your CSS rules simple and focused. Complex selectors may not work reliably.
• Use your browser’s developer tools to inspect the banner HTML and find additional classes you can target.
• If you make changes and they don’t appear, try clearing your browser cache and refreshing the page.
Saving Your CSS
Once you’ve written your custom CSS, click the green Save Changes button to apply it to your banner. Your CSS is automatically saved and will persist even after you refresh the page or log out.
We don't respond to the article feedback, we use it to improve our support content.