
- SureCookie Installation Guide
- Installing SureCookie Pro
- Updating SureCookie
- How to Set Up SureCookie: Onboarding Wizard Guide
- SureCookie Dashboard Overview
- Connecting Your Site to SureCookie (Scanner Setup)
- Using SureCookie on Multiple Sites
- Uninstalling SureCookie & Data Cleanup
- SureCookie Shortcodes Reference
- Preferences Settings (Menu, Branding, Analytics)
- Customizing Banner Content
- Customizing Banner Layout
- Custom CSS for Banner Styling
- How to Configure the Floating Widget
- Customizing the Preference Modal
- Controlling Where the Cookie Banner Appears
- Customizing Banner Colors (Custom Colors, WCAG)
- Customizing the Blocked Content UI
- Banner Text in the Wrong Language (WPML, Polylang, and Locales)
- Re-Consent
- Understanding SureCookie Logs
- How to Set Up Geographic Targeting
- Block Scripts Until Consent (Resource Blocking)
- Setting Up Google Consent Mode v2
- Consent Models Explained (Opt-in vs Opt-out)
- Exporting Consent Logs (PDF Proof + CSV)
- Consent & Data Settings (Duration, Retention, Renew)
- Consent Forwarding Across a Multisite Network
- Resource / Script Blocking (Add Embeds + Fixes)
- Troubleshooting SureCookie
- Fix a Stuck or Failed Cookie Scan
- Why Some Cookies Aren’t Detected
- Banner Not Appearing: Troubleshooting
- Settings or Cookie Categories Not Saving or Loading
- Embeds Blocked After Consent (YouTube, Maps, Vimeo)
- Site Performance / Page Speed
- Scanning Your Site From Your Browser
- Importing and Exporting SureCookie Settings
- Verifying Your Domain With a DNS Record
Cookie Manager: Add, Edit, and Manage Cookies
The Cookie Manager is where you view and manage every cookie on your WordPress site. Whether cookies were detected automatically by the scanner or added manually, you can see them all in one list, update their details, and organize them as needed.
How to Access Cookie Manager
- Open your WordPress dashboard.
- Go to SureCookie > Tracking Manager.
- Click All Cookies in the left sidebar.
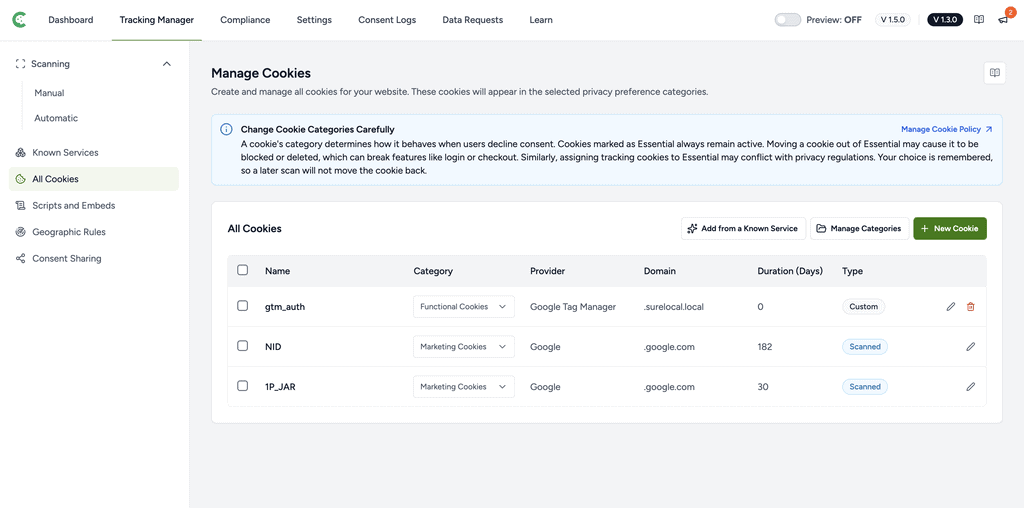
You will see all cookies on your site listed in a table with columns for name, category, provider, domain, duration, and type.
Understanding the Cookie List
Each row in the cookie list represents one cookie on your site. Here is what each column displays:
| Column | What It Shows | Example |
| Name | The unique identifier of the cookie | _ga, wordpress_logged_in, fbp |
| Category | The type or group the cookie belongs to (Essential, Analytics, etc.) | Essential, Analytics, Marketing |
| Provider | The company or service that sets the cookie | Google Analytics, Facebook, WordPress |
| Domain | The website domain where the cookie is used | example.com, .google-analytics.com |
| Duration (Days) | How long the cookie persists. A number is the days until it expires. Session means the browser deletes it when the visitor closes it. A dash means the scan could not read an expiry. | Session, 365, 90, 1 |
| Type | Indicates how the cookie was added to your list | Scanned, Custom |
Add a New Cookie
If the scanner has not detected a cookie on your site or you wish to add a custom cookie, you can add it manually. This is useful for cookies that are set dynamically or only appear after a user interaction. To add a new cookie, follow these steps:
- Click New Cookie at the top right of the cookie list
- Fill in the cookie details using the form fields
- Click Save
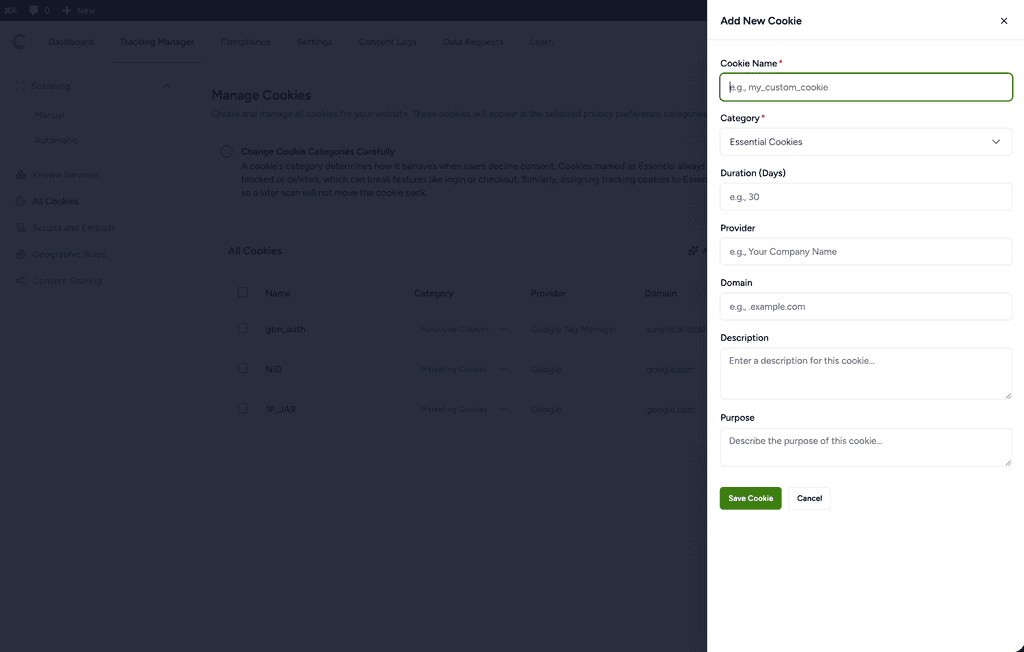
The new cookie appears in the list below and is ready to be assigned to a category.
Edit and Update Cookies
You can edit any cookie in the list by clicking the edit icon on the right side of its row. This opens the same form used when adding a cookie, with the existing details pre-filled. Update any fields and click Save to apply the changes.
Delete Cookies
To delete a cookie, click the delete icon on the right side of the row.
Scanned cookies can be deleted too, from SureCookie 1.5.0 onward. Deleting one removes the row from your cookie list, and from your cookie policy the next time that page is generated.
A deleted scanned cookie comes back on the next scan if your site still sets it. That is what makes deleting one safe: you cannot use it to hide a live tracker from your policy. If the row returns, the plugin, embed or snippet that sets the cookie is still running. Remove that first, then delete the row again.
Editing a scanned cookie does not turn it into a custom cookie. The Edit Scanned Cookie drawer shows the cookie name read-only and lets you correct Category, Duration (Days), Provider and Purpose. Your wording survives later scans. Clear a corrected field to go back to what the scanner reported.
Custom cookies are permanently deleted when removed and do not reappear unless you add them again manually.
A Cookie You Removed Is Still Listed
The scanned list is cumulative by design. A scan adds what it finds and never prunes what it stops seeing, so a cookie stays in your list after you remove the plugin or embed that set it. Nothing clears it for you.
Work through these in order.
- Go to SureCookie > Tracking Manager > All Cookies and find the row.
- Click the delete icon on the right of the row, then confirm.
- Run a scan.
- If the row comes back, the code that sets the cookie is still live on your site. Remove it, then delete the row again.
Some rows have no delete icon. Those cookies are declared by a Known Service rather than observed by a scan. SureCookie publishes the cookies a service is documented to set, because a blocked embed never loads and so never sets them for a scan to find.
If that service shows Added on SureCookie > Tracking Manager > Known Services, click Remove on its card. That deletes the cookies the service added and stops SureCookie declaring them again.
Current limitation: if the service was never added, and SureCookie recognised it from your own pages instead, there is no control in the plugin to clear its declared rows. We have this open as a defect. Contact support in the meantime and we can clear the stored list for you.
If the row is gone from All Cookies but still appears on your public cookie policy page, clear your page cache. The policy table is built from your cookie list every time the page is generated, so a cached copy of that page keeps showing the old rows until it is purged.
How Scanned and Custom Cookies Work Together
If a cookie exists as both a scanned entry and a custom entry, SureCookie uses the custom entry and ignores the scanned one. This means you can manually correct or update how a cookie is configured without the scanner overwriting your changes.
If you delete a custom entry later and the scanner detects that cookie again, the scanned entry will reappear in your list on the next scan.
Keep Your Cookie List Updated
A well maintained cookie list ensures your consent banner shows visitors exactly what is running on your site. Run a scan and review your cookies after:
- Installing or updating WordPress plugins or themes
- Adding new integrations such as email services, analytics tools, or ad networks
- Making changes to your site code
- At least once per month as a routine check
Next Steps
With the list accurate, check that each cookie sits in the right consent group. See Manage Cookie Categories. To understand the rows you cannot delete, see Using Known Services.
We don't respond to the article feedback, we use it to improve our support content.